
In class we have covered most material in chapters 1 (Computer Basics) and 3 (Internet and the Web), and have started on chapter 2 (HTML and web-pages). Next Wednesday we will meet in the lab (CTI 819) from 5:45-7:15; we will continue in the regular classroom during the second half.
We will not cover Chapter 6 on the history of computers, but it makes good reading about the times before PCs and the internet took over the world.
1. [HTML] Set
up a simple resumé web-page on your students.depaul.edu account. If
you don't want to create a resumé for yourself, create a fake resumé for your
favorite
celebrity or a fictitious person.
Your page
should include text formatting (like emphasis, bolding and special characters, e.g. see Special Characters table for a list of special characters available to you)
at least one picture (of the subject of your resumé, for example)
a list of some of your favorite things (if you know how to make links, include links)
be readable; feel free to make it aesthetically pleasing ...
To work under Windows follow these steps:
i) Write a file resume.html (using for example Word under Windows, or Notepad) containing your resumé. When you save the file, make sure you save it as a text file.
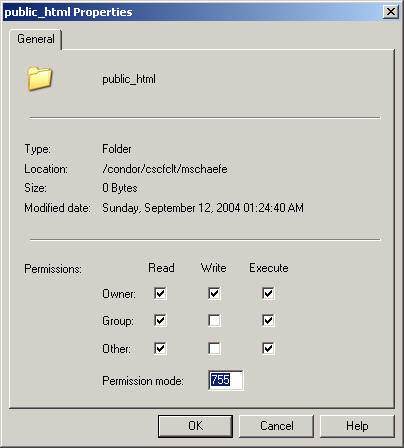
ii) Transfer your file and image(s) into the directory public_html using ssh (see the links page). If there is no public_html directory, first create one. The ssh file transfer client will allow you to create the directory (hit the new folder button). Check that the permissions for the directory are set as shown below (the window might look a bit different depending on what software you are using):

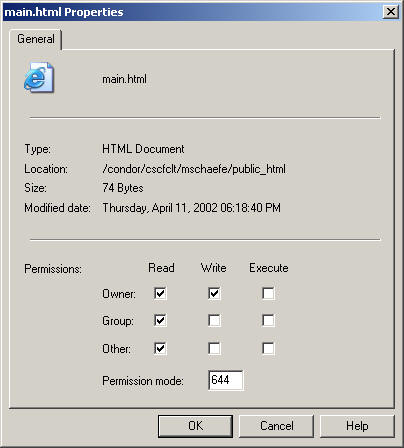
If necessary, also change the permissions of the file (this also applies to the images). File permissions should be set as follows (again, your window might look slightly different):

You can look at the result by pointing your browser at
http://students.depaul.edu/~username/resume.html.
To upload your image to your students account follow step ii) above.
You can work on a different account if you want to (at your own risk), just make sure you do part 3 below.
2. [activate student account (not for DL students)] Go to lab accounts and activate your student account, so you can use the CTI computer labs. You will need your campusconnect login and password information, which is different from your students.depaul.edu login and password.
3. [email] When you are done with parts 1 and 2 send me an email
use the email account you'll be using for the duration of this class (this is the email which I will use to email you)
include "IT 130, hw1" in the subject line
the body of your message should include the URL of your web-page (not the local file-name, but really the URL; test it in a browser before you send it to me; a URL starts with http://, not with file:///)
tell me that you activated your student account (not for DL students)
the email should have your name in it